Introduction
It's summer here which means the weather starts getting warmer and my electricity bill starts going up due to the AC coming on. Now I'm not a big fan of spending money when I don't have to, and if I can help the environment while saving money that's a nice bonus. As such I open the windows when it's cooler outside than it is inside, and then close the windows before it starts warming up. By doing that I usually don't need to turn the AC on at all until about mid-July. However, one problem that I have is that I don't know exactly when it'll be cooler outside than it is inside, and vice-versa. At best, I'm checking the weather a lot and comparing it to what my thermostat says, and at worst I don't notice until the AC kicks on or it starts feeling warm inside. I've recently set up a Home Assistant VM on my Unraid box (check out SpaceInvaderOne's video on that if you'd like to know how to do that) and I started wondering if I could use HA to help take the guesswork out for me. After a bit of experimentation I've come up with an implementation that I'm satisfied with. It requires basically no special hardware and if you are already a home assistant user you can probably set it up in just a few minutes. So without further ado, let's jump into the tutorial!
Bill of Materials
This project requires only one piece of physical hardware and you probably already have it if you have a smart home. In total what you'll need is:
- A Home Assistant instance (whether self-hosted or cloud-based)
- A Home Assistant compatible sensor for measuring the temperature inside your home (any smart thermostat will do the trick, but it doesn't have to be a smart thermostat)
- A free OpenWeatherMap API key or another Home Assistant compatible sensor for measuring temperature outside your home (We'll go over how to get the API key in this article)
- A mobile device that has the Home Assistant App and can receive notifications (Or anything else that you can use as your bat signal to do something with the windows)
Steps
1 - Set up OpenWeatherMap Integration
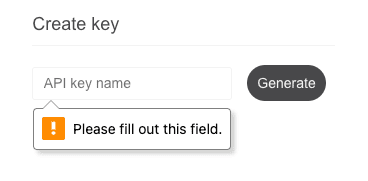
OpenWeatherMap is how we will get temperature data for our location. You can skip this step if you already have a preferred way for getting the temperature outside your home. This is what I use because it is free and easy to set up. Before we set up the integration, we need to make an account at https://home.openweathermap.org/users/sign_up. Once you've made an account and signed in, you can go to the https://home.openweathermap.org/api_keys page and generate an API key. Feel free to name it whatever you'd like.
API keys do take a few minutes to become active, so now's a good time to go get a snack. After a few minutes we can add the openweathermap integration in Home Assistant. From settings, go to the integrations tab and then hit the add integration button. from there you can search for OpenWeatherMap. The integration will look like this:
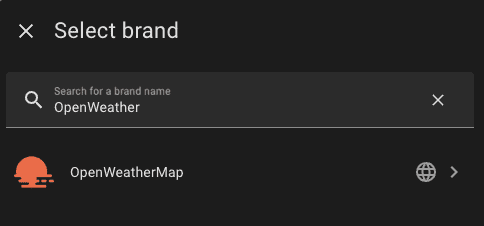
OpenWeatherMap Integration
Then, all you need to do is enter in your API key from earlier and make sure that your Latitude, Longitude, and language are correct. At the time of writing, there is a mode option of which there are 3 modes, v3.0 is checked by default and can be left as such. If you get errors about an invalid API key, it probably means that your API key you generated earlier hasn't finished baking and you need to wait some more. Once you've added the integration, you should be able to see a lovely new weather tile on your dashboard:
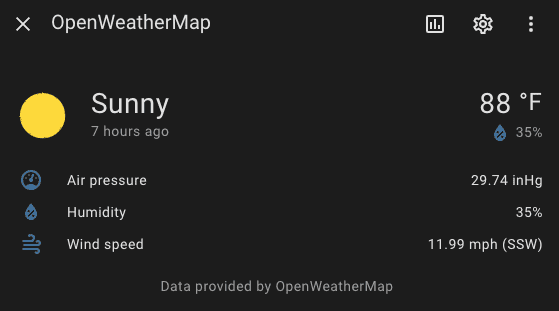
Now we are ready to move onto the next step.
2 - Set up Indoor Sensor/Notification device
There's a good chance you (like me) will already have this set up if you are using Home Assistant. But before we can write the automations we will need some way of measuring the temperature inside. Again, my Ecobee thermostat is what I am using. And you'll need the Home Assistant App on your phone if you'd like to get a notification when it's time to open or close the windows. I won't include tutorials for how to do either of those things because there is plenty available online.
3 - Create the "Open Windows" Automation
In case you've never done so, you can get to the automations menu from Settings->Automations&Scenes From here we are going to create a new automation using the button in the bottom right corner. By default you'll be presented with a graphical automation creation tool, which is user-friendly, but to get you jumpstarted you can enable the "Edit in yaml" option from the triple-dot context menu in the top right. From there you should be presented with a code editor. Go ahead and replace any existing contents with the following:
alias: Open Windows
description: ""
triggers:
  - trigger: template
    value_template: >-
      {{ states('sensor.my_ecobee_current_temperature') | float >
      states('sensor.openweathermap_temperature') | float }}
    alias: If cooler outside than inside
conditions:
  - condition: template
    value_template: |
      {% set n = now() %} {{ n.month > 4 and n.month < 10 }}
    alias: If summer month
actions:
  - action: notify.mobile_app_<YOUR_PHONE_HERE>
    metadata: {}
    data:
      message: Time to Open the windows
  - action: automation.turn_on
    metadata: {}
    data: {}
    target:
      entity_id: automation.close_windows
  - action: automation.turn_off
    metadata: {}
    data:
      stop_actions: true
    target:
      entity_id: automation.open_windows
mode: single
You'll need to at least update the YOUR_PHONE_HERE part to match your phone's entity ID. If you aren't sure what that is the easiest thing to do is to go back to the visual editor and add a new action, and then search for Send a notification via and all of the mobile devices with the home assistant app will appear. If you'd like to send notifications to more than one phone you'll need to add more actions. You may need to update other sensors like the my_ecobee_current_temperature if you don't have an ecobee and the openweathermap_temperature if you are using another external temperature provider. Once you've made your changes go ahead and save them and we can go onto the next automation.
4 - Create the "Close Windows" Automation
This next automation is very similar to the previous one, except this one will remind us to close the windows instead of open them. Here's the boilerplate:
alias: Close Windows
description: ""
triggers:
  - trigger: template
    value_template: >-
      {{ states('sensor.my_ecobee_current_temperature') | float <
      states('sensor.openweathermap_temperature') | float - 1 }}
    alias: If outside temp approaches inside temp
conditions:
  - condition: template
    value_template: |
      {% set n = now() %} {{ n.month > 4 and n.month < 10 }}
    alias: Is summer month
actions:
  - action: notify.mobile_app_<YOUR_PHONE_HERE>
    metadata: {}
    data:
      message: Time to Close the windows
  - action: automation.turn_on
    metadata: {}
    data: {}
    target:
      entity_id: automation.open_windows
  - action: automation.turn_off
    metadata: {}
    data:
      stop_actions: true
    target:
      entity_id: automation.close_windows
mode: single
Note that you'll need to make the same edits to this yaml as you did the previous one. Once you are finished you can go ahead and save your work.
5 - Deactivate the Current State
The last step is to deactivate one of the automations. This can be done from the slider on the right hand side in the automations menu:

It's important to deactivate the current "state" so if the windows are currently closed, deactivate the "Close Windows" automation. If they are open, deactivate the "Open Windows" automation. Why this is important will be explained later.
Conclusion
That's all you need to do go get a basic system set up! In case you are curious here's how it works. When the outside temperature gets below the inside temperature, we'll check to see if we are in a summer month (no need to open the windows during the winter) and if so, we'll send our phone a notification, activate the "Close Window" automation and then deactivate the "Open Window" automation. The "Close Window" automation does essentially the same thing but flipped. So you might be wondering, "Why all the activating and deactivating?" Well, the reason is that we don't want to accidentally spam ourselves with multiple notifications. This is potentially a bit overkill, but it was a nice visual for me to see the state of my system at any given point. From here you could add some additional customizations, maybe have a smart lamp change colors depending on what state the windows need to be in, or only send notifications to those who are at home, or set this up on a per-room basis. Hopefully this guide was enough to get you started. Best of luck!