Introduction
Strapi is an incredibly useful tool that allows you to quickly spin up a CMS without being forced into a particular hosting platform/frontend. However, unlike a traditional CMS like Wordpress, you are going to have to host your instance yourself. For an independent developer, paying a monthly subscription to host your project may not seem very appealing. Fortunately for us, leveraging Oracle cloud and other free tools we can get our instance hosted for $0 no strings attached!
Pre-Requisites
This guide assumes you already have the following:
A set up Strapi Project
This guide will not go over how to set up a strapi project, Strapi has good documentation on their site. We will also need our strapi project to be containerized, since our Oracle cloud VM will not be powerful enough to build the project from scratch. Strapi has a good dockerfile that you can use to create your image. Once you have built your image, you will want some kind of script you can use to run it, I have an example in my blog project. Don't forget to push your container image up to dockerhub so we can pull it down to our VM.
An Oracle Cloud Account
I won't go over creating an Oracle cloud account in this guide, but there are lots of guides available on the internet. It's also fairly straightforward. An Important Note: You will need to provide a credit card number to create your account, but you will not be charged ever if you select an "always free" account. The Credit Card is just to prevent people from making many free accounts (I would imagine).
With those out of the way, let's get started with the guide!
Step 1: Creating our VM
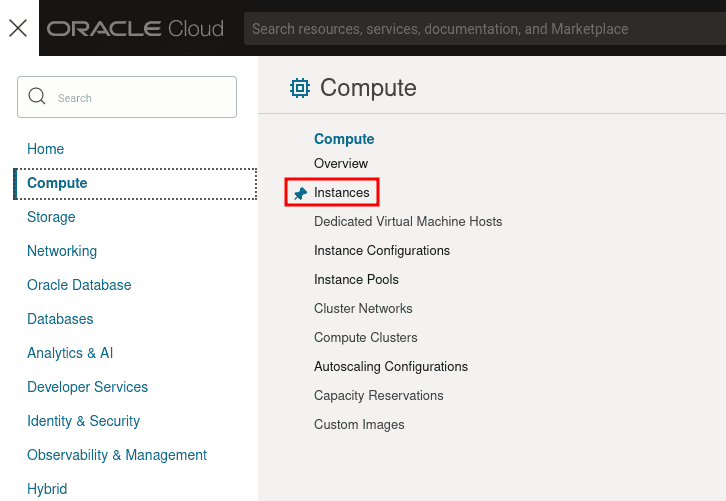
Once you are able to log into your Oracle Cloud account head to the instances menu under the compute section.
Oracle Cloud Hamburger Menu
Once you are there you can click the create instance button. You will be given plenty of options, but we can leave most of them on the default settings. At the time of writing you get 2 free VM.Standard.E2.1.Micro instances which have 1 core and 1 GB of memory. It isn't a lot! However, as long as your website isn't getting too much traffic it is enough. I'd recommend switching the operating system to Ubuntu instead of the default Oracle Linux, but that is up to you.
Be sure to either generate ssh keys to use with the VM using the UI, or upload your own existing public key. Everything else can be left default. It will take only a few minutes for your VM to come up. Once it does, we can set up some firewall rules to allow traffic into the VM. Under the section called Primary VNIC there should be a hyperlink for your subnet. Go ahead and click into that and on the next page find the Security list and click into that menu as well.

Security Lists sub-menu
Once you are in the menu for the security list, we are going to add two ingress rules, one that allows traffic from all hosts and all ports to port 443 (for HTTPS communication) and another rule that allows traffic from all hosts and all ports to port 80 (HTTP communication). Your rules should look like the following:

Now that we've set up our Ingress rules, we start doing some configuration from inside the VM. SSH into your VM using the username and IP address listed on the info page for your instance.
Step 2: Configuring our VM
Now that we are successfully able to connect to the VM, we can start getting it ready to run our instance of Strapi. One of the first things we should do is download docker. We can do that by running the following:
# Add Docker's official GPG key:
sudo apt-get update
sudo apt-get install ca-certificates curl
sudo install -m 0755 -d /etc/apt/keyrings
sudo curl -fsSL https://download.docker.com/linux/ubuntu/gpg -o /etc/apt/keyrings/docker.asc
sudo chmod a+r /etc/apt/keyrings/docker.asc
# Add the repository to Apt sources:
echo \
  "deb [arch=$(dpkg --print-architecture) signed-by=/etc/apt/keyrings/docker.asc] https://download.docker.com/linux/ubuntu \
  $(. /etc/os-release && echo "$VERSION_CODENAME") stable" | \
  sudo tee /etc/apt/sources.list.d/docker.list > /dev/null
sudo apt-get update

# Install Docker
sudo apt-get install docker-ce docker-ce-cli containerd.io docker-buildx-plugin docker-compose-plugin
To make it so that we don't have to run docker with sudo, do the following:
sudo groupadd docker
sudo usermod -aG docker $USER
Oracle by default locks down the firewall and network rules on the VM so only SSH is enabled, we will want to open up the ports for http and https:
# Allow traffic on port 80 (HTTP)
sudo iptables -I INPUT 6 -m state --state NEW -p tcp --dport 80 -j ACCEPT
sudo netfilter-persistent save
# Allow traffic on port 443 (HTTPS)
sudo iptables -I INPUT 6 -m state --state NEW -p tcp --dport 443 -j ACCEPT
sudo netfilter-persistent save
Step 3: Running our Docker Container
Now we are ready to run the docker container, we can grab our shell script to run it that we created earlier. You'll want something that looks like this:
docker container run -p 127.0.0.1:1337:1337 -v ./database:/opt/app/.tmp -v ./uploads:/opt/app/public/uploads -it your_image:your_tagYours doesn't necessarily need to be exactly like mine, but here are a few important notes.
- We will need to make sure we expose our strapi port (default is 1337) on localhost, we will use nginx as a reverse proxy to forward the traffic to our container
- We need to mount a volume for /opt/app/.tmp for the database (if you are using sqlite as the database)
- We also need to mount a volume for /opt/app/public/uploads as that is where uploaded media gets put
Before running the container you will want create the ./database and ./upload dirs. I would recommend doing this in /home/opc. The reason is that the node user that runs in the container has the unix id of 1000. The opc user in the VM has the same id (ubuntu has the id of 1001). You should definitely make sure that the owner of those directories is opc.
Once the container is running you should be able to curl localhost:1337 and get some html back from our running strapi instance!
Step 4: Getting a Domain Name
In order to access our strapi instance with https (required if your frontend is being served over https) we will need a registered domain name. domain names are relatively inexpensive, but you can get a subdomain for free with services like noip. For this guide, I'll show you how to use noip. go to noip.com and follow the steps to create an account. During the process you will create your subdomain.
Once you have a subdomain, set it to be a DNS Hostname (A) and for the IP, use the IP address of your VM. To test the registration, you can try starting an SSH session using the new hostname instead of the IP address. Once that is working you can move on to the next step!
As a note, in order to keep your DNS registration active, you will need to log in to your account at least once per month.
Step 5: Setting Up a Reverse Proxy
To route both HTTP and HTTPS traffic to our docker container (which at this point is only available inside the VM) we will need a Reverse Proxy. You could use lots of different things to do this, like traefik, however, we only need something simple and nginx is very quick to set up.
From an SSH session to your VM, we'll need to first install nginx:
sudo apt install nginxNow that nginx is installed we can make sure it is online by running:
sudo systemctl start nginxWe'll now need to create a server block to tell nginx to forward traffic to our docker container. We can do that by creating the a file at
/etc/nginx/sites-available/your_domain where your_domain is the domain name you chose in noip. The contents of the file should looks something like this:
server {
    listen 80;
    listen [::]:80;

    server_name your_domain;

    location / {
        proxy_pass http://127.0.0.1:1337;
        include proxy_params;
    }
}
make sure to replace your_domain with the domain you chose on noip again.
Once you've made your file you can create a symlink to it in /etc/nginx/sites-enabled/
sudo ln -s /etc/nginx/sites-available/your_domain /etc/nginx/sites-enabled/We can make sure the syntax is correct by running
sudo nginx -tAnd then finally restart nginx once any issues have been resolved
sudo systemctl restart nginxYou should now be able to navigate to http://your_domain/admin from your browser and be greeted by the login page for your strapi instance!
Step 6: Getting an SSL Cert
This is the final step in getting our instance set up. All we need to do know is get a SSL cert and we will be able to access our instance via https. The easiest way to do this is by using certbot, which gets us a cert from acme let's encrypt. Luckily for us, certbot will handle most of the legwork and has excellent instructions on getting it set up.
To save you a click, here are the instructions:
# Install certbot
sudo snap install --classic certbot
# create a symlink to a spot on our $PATH
sudo ln -s /snap/bin/certbot /usr/bin/certbot
# Get and install certificate
# Just follow the on-screen instructions
sudo certbot --nginx
Once you've run certbot you should now have an ssl certificate and you should be able to nagivate to https://your_domain/admin and see your admin panel!
Now you can hook your frontend into your backend and begin creating content! Happy hacking 😎